Showing posts with label Windows 10. Show all posts

Wednesday, December 30, 2020

5 Easy Ways to Speed up Your Internet on Windows 10

 Everyone longs for a fast internet connection. Waiting several minutes to load a web page is quite frustrating. To get rid of this problem, people often buy expensive internet plans without realizing that the problem may be with their computer’s operating system.

5 Easy Ways to Speed up Your Internet on Windows 10

In this article, we will discuss some simple tips that will help you improve your Internet speed on Windows 10, as long as you have an active connection. If you are still looking for a service provider, we highly recommend Spectrum Internet, which is extremely fast and reliable. So, without further ado, let’s get started.

How to Speed up internet on windows 10

Here we provide you 5 easy ways to speed up your internet connection in Windows 10. If you use tricks, you can undoubtedly increase internet speed in Windows 10. Check out the fastest way to improve internet speed.

1. Change your computer’s power settings

The first step to improve your Internet connection and computer speed on Windows 10 is to change the battery settings. Battery saving function drastically reduces the performance of your system; Therefore, it is recommended to change the settings from battery saver to high performance to get the most from your computer. Settings can be changed from the control panel or directly by clicking on the battery icon in the right corner of the taskbar.

2. Disable programs that run automatically at startup

Programs running in the background slow down your computer. Therefore, it is important to close any app that you rarely or never use. To stop all unnecessary programs, launch Task Manager by pressing Ctrl + Shift + Esc in your Windows 10 search box or simply typing in Task Manager. Once Task Manager appears on your screen, choose Programs. If you are not using and press end task. In Task Manager you will also see a Startup tab. This tab will show you a complete list of all the applications that run automatically when starting your computer. Disable programs you may or may not use occasionally. When you have completed this process, you can feel a lot different in your personal computer performance and your Internet speed.

3. Disable Windows Tips, Tutorials, and Tips

Windows 10 monitors your activities and gives you suggestions on the tasks you want to do on your operating system. These tips and tutorials can also slow down your system. So, to speed things up, turn off the tips and tricks provided by Windows. Go to the Start menu, click System, then Notifications and Tasks. You no longer need to “get tips, tricks and suggestions when using Windows”. Therefore, uncheck and disable this notification. enough …! Your computer will run much easier than before.

4. Disable One Drive from Syncing Files

Microsoft’s cloud service is built into Windows 10 and keeps all files updated on all your devices. Although it is a useful application, it consumes a large portion of your RAM which makes your computer system sluggish and inefficient. To improve your system performance, you can temporarily turn off One Drive to synchronize your files, and before turning off your computer, you can turn it back on to sync your data. Huh. Hover the mouse in the lower right corner of the taskbar and you will see a cloud icon, which is One Drive. Right-click on this icon and you will see a list of tasks you can take. Just choose to Pause Sync. You can stop synchronization for 2 hours, 8 hours, or 24 hours, depending on what time you want to use the computer with better performance. Before stopping, start the syncing again and all your data will be returned immediately.

5. Deactivate Search Indexing on Windows 10

Windows 10 continuously indexes your hard drive in the background so that you can find files faster. However, this feature is not as useful as it sounds. Your computer gets a serious performance impact with search indexing. Therefore, to get the most from your Windows, turn off search indexing. To do this, simply type service. msc in the search box and press Enter. When the Services application appears on your screen, scroll to Indexing Services, double-click it and click Stop. After that restart your computer. You may experience slow searches, but your computer performance and the Internet speed will improve dramatically.

Finish

Keep the above suggestions in mind and whenever you face slow speed, give them a try. You will see a significant improvement in the speed of your computer and your internet connection. Catch more window hacking by subscribing to our mailing lists.

Tuesday, December 29, 2020

Microsoft to shift SMBs' Office subscriptions to 'Microsoft 365' brand


Microsoft today announced name changes to the Office 365 subscription plans in the Business line, substituting "Microsoft 365" instead.

The Redmond, Wash. developer did not touch subscription plans aimed at enterprise, education and government.

Plan names will automatically change on April 21, Microsoft said in an online statement. Prices of the plans will not change.

  • Office 365 Business Essentials, the lowest-priced plan in the Business line, will become Microsoft 365 Business Basic.
  • Office 365 Business, the middling plan in the trio that provides the Office applications and OneDrive, but no other services, will become Microsoft 365 Apps.
  • Office 365 Business Premium, the most capable and most expensive subscription plan of the three, will become Microsoft 365 Business Standard.
Microsoft will change the moniker of Microsoft 365 Business to Microsoft 365 Business Premium to fit it into the Business line as the top-dollar $20 per-user per-month plan. That subscription adds security and management tools to Office 365 Business Standard, née Premium. (Currently, this is the lowest-priced plan in the Microsoft 365 line. After the name changes, though, it will fall somewhere in the middle.)

Finally, the orphan of Office 365, the Office 365 ProPlus deal, which like Office 365 Business limits the bits to the Office applications and OneDrive, will get the same Microsoft 365 Apps nameplate. (Microsoft said if it needed to differentiate the two, it would append "for business" and "for enterprise" on the offerings.)

Subscription label changes aside, everything will remain untouched. "There are no price or feature changes to plans at this time (emphasis added)," Microsoft said in a short Q&A embedded in the announcement.

"We want our products to reflect the range of features and benefits in the subscription," the company noted, again in the Q&A. Specifically, Microsoft pointed to past additions to Office 365 Business Essentials and Business Premium plans, notably the Teams collaboration, video conferencing and online meeting software, as justifying a step up in naming.

"Second, we're always looking for ways to simplify," the company continued. "This new approach to naming our products is designed to help you quickly find the plan you need and get back to your business."

Microsoft's second reason was the weaker of the two.

Ever since the 2017 introduction of Microsoft 365 as a subscription plan label, Microsoft has had an identity problem, with that line and the much older Office 365 crossing streams. Just what was Microsoft 365? How was it different -- better than, by price anyway -- from the original?

Initially, Microsoft 365 was an über-suite, an über-subscription, for it started with Office 365, then added more, most importantly a subscription to Windows 10. Microsoft 365, then, was Office 365 + Windows 10. (It was more, but those pieces were the most important.)

Microsoft could be applauded by bringing more of its subscriptions under the Microsoft 365 moniker - that's clearly the name that will rule all at some point - but the brand remains scatter-brained. Some subscriptions are for consumers, as Microsoft also today announced an Office 365-to-Microsoft 365 name change for its Personal and Home deals; others are for business but sans Windows 10; yet more are for enterprises wishing for the kitchen sink, Windows included.

That's not a brand, that's just a mob.

And a large swath of Microsoft's plans will remain, at least for now, tapped as Office 365, including all the enterprise-, education- and government-aimed subscriptions, ranging from Office 365 A1 to Office 365 E5. To crowd those plans under a Microsoft 365 umbrella will take some doing, as the company will have to figure out how to untangle the duplicate x3 and x5 suffixes.

10 Common Windows 10 Issues and Solutions

 It has been almost 4 years since Windows 10 became available to the public user base, which was ready to be moved from Windows 8. But despite the reforms, some issues remained to be resolved.

windows 10 issues

Take a look at these 10 Windows 10 problems and solutions that any user can use to improve their time with this operating system.

Windows 10 problems and solutions

There are problems at all levels of an operating system, from installation to specific applications and processes. Some solutions may affect the way the operating system is running due to visual changes. If you take the time to change it, Windows 10 can be modified to meet some very specific requirements.

1. Installation

If you recall some time ago, Microsoft offered Windows 10 for free. Partly because many users became addicted to Windows 7 due to the changes made in Windows 8. Another reason was that some problems were on the way.

Before installing the operating system, there are a few things to check. The first is whether your current hard drive has enough space. However, the requirement of the previous two Windows operating systems is the same and almost none use such a small hard drive.

The second problem is the power of your system. Since Windows 7, many visual upgrades and background processes have been implemented. Don’t be surprised if your old Windows XP laptop can’t handle the upgrade.

2. Forced Updates

The forcing update was an idea with potentially good intentions. Some users, like the elderly, do not know that regular updates help secure their systems. Therefore Microsoft has forcibly applied the update.

Unfortunately, this also meant that some users were receiving updates at inconvenient times. Sometimes updates have made the computer unusable. It was so bad that people sued.

The user can now disable these updates as he did before:

  1. Open the start menu
  2. Type gpedit.msc in the search bar and choose the top option
  3. Follow the folder path: Computer Configuration \ Administrative Templates \ Windows Components \ Windows Update
  4. Configure and Configure Open Automatic Update Policy
  5. Select disabled
  6. Click apply
  7. Click OK

Be sure to update regularly when you have time via the Settings menu. Check for Settings / Updates and Security \ Windows Update \ Updates. Keeping up-to-date helps to keep your information secure.

3. Block Pop-ups in Edge

Nobody likes pop-ups while browsing. They can range from annoying pests to possible destruction of the system. Blocking these can also increase the loading speed of a website.

The default web browser for Windows 10 is Edge, which has a built-in pop-up blocker. It can be disabled by default but it is very easy to work with:

  1. Open edge
  2. Click three points on the top right
  3. Scroll until you get advanced settings
  4. Click block pop-up

Remember that some websites require pop-ups in your browser to function properly. To reactivate the popup window, simply repeat the steps and deactivate the blocker.

4. Create a System Restore Point

Another feature that is not enabled by default is that it allows you to restore your system to the state you were in when you set the restore point. If something goes wrong, you may want to set a restore point before a major update.

Activating it is quite simple:

  1. Open the Start menu and search for System Restore.
  2. Create a restore point and click to open the system properties panel
  3. Choose the System Protection tab
  4. Choose drive C: and click Configure
  5. Make sure the Enable System Security option is checked.
  6. Use the slider to choose between 5% and 10% of your hard drive to use for restore points.

5. I can not play DVD

By the time Windows 10 was released, most people had moved from DVD and other physical media to digital distribution. Since most computers do not come with a dedicated DVD player, the software allows your computer to read them. However, a better option is to download a free media player that can play DVDs instead of purchasing an external player or an expensive player.

6. Change the default application

Sometimes Windows 10 will try to open a new file type with the wrong application. Or, you have installed a separate application to open the files and need to change the default application. If Windows 10 does not know a new file type, it will ask you how you want it to run when you try to open it.

But if you want to change a default application before attempting to open a file type or if you need to change multiple default settings at once, you will need to use the settings:

  1. Open windows settings
  2. Click on default application then the application
  3. Choose the application you want to modify
  4. Select from the drop-down list

If you need to reset the default apps, you can always reset from the menu. If you run a company that makes apps and needs to know how to get people to choose your default, consider software QA.

7. Hide notifications

You’ll probably get tired of seeing them later, so you can also choose the ones you want to see now. Open the Settings menu again:

     In the Settings window, click System

     Click on Notifications and Actions

     Select the information you want to display.

8. Add or remove icons from the taskbar

You want your most-used apps available at all times and the best place to do this is right in the taskbar. You can open them with one click, even if you have another window open. But if there are too many icons, your taskbar will close quickly.

To remove an icon, simply right click on it and select Detach from the taskbar. To add an icon, open the app and right-click on its tab and choose Pin to taskbar.

9. Synchronization with other devices

If you have a Windows 10 computer, phone, and tablet, you can synchronize your information with all of them at once. Using your Microsoft account, you can configure all your devices to share bookmarks, applications, and settings so you don’t have to do it one by one. Just go to https://login.live.com/ and configure your sync settings, then log in on each device.

10. Stop Sharing

One of the biggest issues facing Windows 8, and now 10, is the amount of information they collect. If what you want to do for yourself, check the Privacy tab in your settings. Many people disable everything unless a specific application needs to access it.

Become an experienced user

These are just a few Windows 10 problems and solutions. Windows 10 offers many options and settings that will allow you to take ownership when you take the time.

See our other articles on how you can optimize your operating system.

Sunday, December 27, 2020

How to fix Windows update error 0x8024a000 in a few steps

 This software will fix common computer errors, protect you from file loss, malware, hardware failures and optimize your PC for maximum performance. Fix PC problems and remove viruses in 3 simple steps:

  • Download this excellent PC repair tool from TrustPilot.com.
  • Click Start Scan to find Windows problems that may be caused by PC problems.
  • Click Repair All to solve problems with patented technologies (special discounts for our readers).

When you get the error code 0x8024a000, remember that it is related to Windows Update. When you try to update Windows from Microsoft site, you can see it.

There is nothing wrong with using the latest features and technologies. This error may be caused by an interruption in the connection between your computer and the Windows Update server.

To solve this problem, note that initially, a lost Internet connection can also cause the reception of error 0x8024a000 that you are currently trying to correct. The list extends to faulty hardware components, a system infected with malware, file corruption, and more.

You can try to fix this Windows Update error yourself. However, it is recommended to follow the advice of experts to simplify the process. Look for a solution here and you will not be disappointed.

How can I get rid of Windows Update error 0x8024a000?

1. Exclude faulty cable, router or modem

Windows update error 0x8024a000

Check your modem, router, cable, etc. To ensure that all these components are working properly. You should also reboot the router and try to complete the update again.

If there is nothing cloudy here, please proceed to the next step.

2. Run an antivirus scan

fix Windows update error 0x8024a000

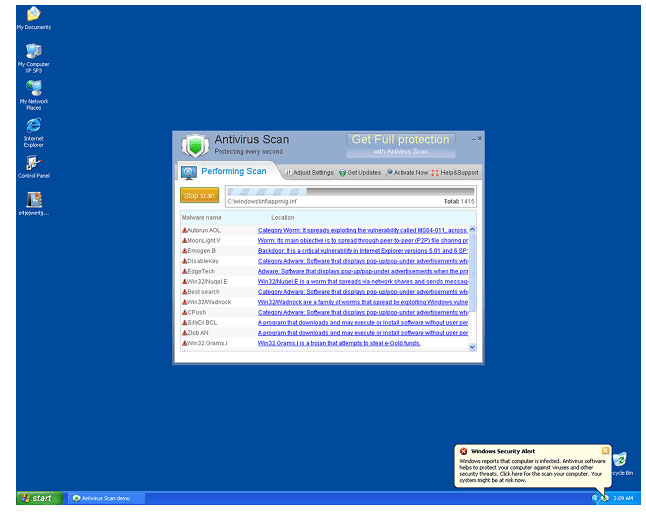
What to do if your system is infected with malware? Also, eliminate this possibility by running a Windows Defender program built into your PC to scan for malware or viruses.

If it identifies the malware, then you should remove it from your PC and return what you were doing when you received the error code.

Need help with that? We have listed the best virus removal tools for Windows 10 to choose from.

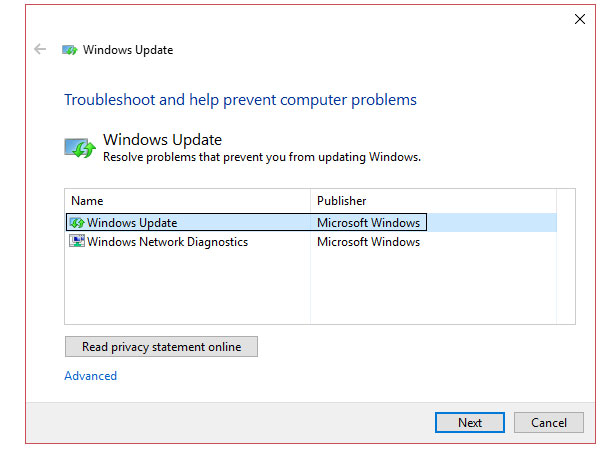
3. Run Windows Update Troubleshooter

how to fix Windows update error 0x8024a000

  • Type troubleshooting in the Windows search bar.
  • Click Troubleshooting.
  • Then, in the left pane of the window, select Show All.
  • Alternatively, you can select Start> Settings> Updates and Security> Troubleshooting.
  • Select Windows Update from the Computer Troubleshooting list.
  • Follow the on-screen instructions and answer any specific questions.
  • Run Windows Update Troubleshooting.
  • Then restart your PC.

Let us keep this scenario in mind as well. Corrupted download or incomplete installation of the Windows Update software is causing this error. The same goes for possible overload or deleted system registry files of the operating system.

We just showed you above how to let the Windows Update troubleshooter do all this. At the end of the process, try to install updates that were not fully installed before.

Can not open the Settings app? Take a look at this article to fix the problem.

4. Clean the Windows Update temporary cache folder

fix Windows error 0x8024a000

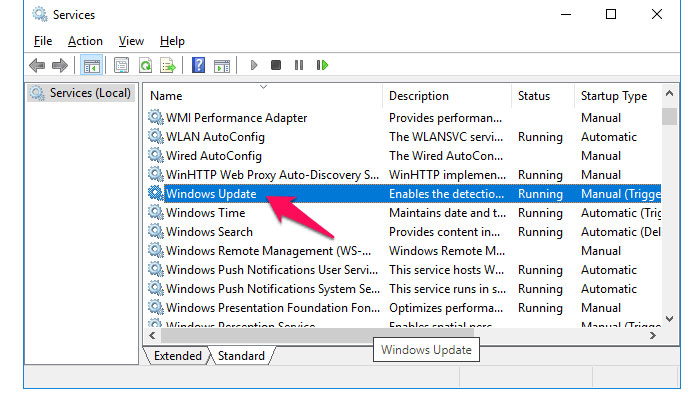
  • Press the Win + R keyboard shortcut key, then type services.msc.
  • Press enter.
  • A new window will open on your system containing all Windows services. Find Windows Update.
  • Right-click on it.
  • After this click on the Stop button.
  • You are now ready to clean the Windows Update Temporary Cache folder, so hold down your Windows key and press the R key at the same time.
  • A new window will then appear, so type% Windir% SoftwareDistributionDataStore.
  • Click OK.
  • This will open Windows Explorer. Now you can delete the entire contents of the given folder.

If the above troubleshooter does not work, you may suspect that the problem is related to a corrupted old Windows update that is being downloaded to your system.

Refer to the procedure described here to clear the temporary cache folder. Then you can go back to Windows Services.

Find Windows Update, right-click on it and choose Start. In this way, your problem should be solved now.

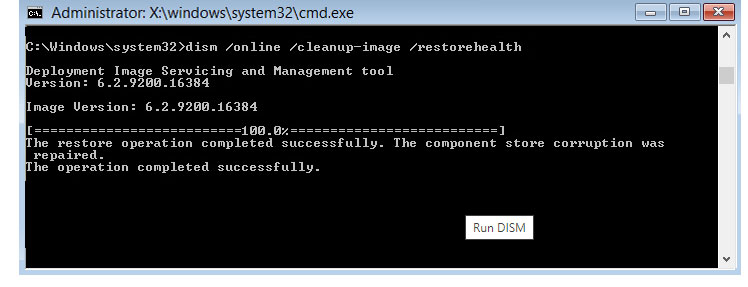
5. Run Deployment Image Servicing and Management

fix Windows update error 0x8024a000

  • Press the Windows key + X, then choose Command Prompt (Administration).
  • Enter the following command in cmd: DISM.exe / online / cleanup-image / restore.
  • Press enter.
  • After the process is complete, type the following in cmd: sfc / scannow.
  • Let the system file checker run.
  • Finally, restart your PC.

If you are having trouble accessing the command prompt as an administrator, you will have a better look at this guide.

If the error is corrected, then running DISM is now your best bet.

DISM.exe / online / cleanup-image / restore command
Does not work, try typing it instead:

Dism / Image: C: offline / Cleanup-Image / RestoreHealth / Source: c: testmountwindows
Dism / Online / Cleanup-Image / RestoreHealth / Source: c: testmountwindows / LimitAccess
Looks like everything loses when DISM fails on Windows? Check out this quick guide and get rid of worries.

Another effective solution is to reinstall Windows 10. This method should be used as a last resort because it can sacrifice your data and all applications on your drive.

We hope that our suggestions have proved useful in trying to get a new download for the update and reinstall it. now you can fix Windows update error 0x8024a000

If you still have other questions or suggestions, feel free to leave them in the comments section below.

Saturday, December 26, 2020

How to Factory Reset Windows 10 with Easy Steps

 Windows 10 has been seen as the most stable release of Microsoft’s flagship operating system, although several issues and minor updates have soaked this reputation somewhat in recent years.

Things can – and often do – become slightly fuzzy, slow, or unusable after a lot of use, potentially suffering even with day-to-day performance if your machine gathers from files, unused libraries, and software The dust that accumulates. Over time, performance and reliability will deteriorate, and the amount of digital litter on your machine will begin to disrupt your user experience. Some, obviously, must be done, and many may feel right now and then that a massive clearout is needed. However, this should be done without affecting any important files and folders stored on the machine.

Factory Reset Windows 10

Fortunately, Windows 10 is built with the ability to reset PCs to factory settings without ending any of these important files and applications. This exponentially increases performance and means that using your computer is no longer a headache that can occur.

Performing such a reset on your computer means that it not only runs smoothly, but it can also fix a lot of problems with software or critical drivers. The issues you are experiencing before can be fixed by restoring factoring settings, before opening up to any costly technical support.

How to perform a factory reset on Windows 10

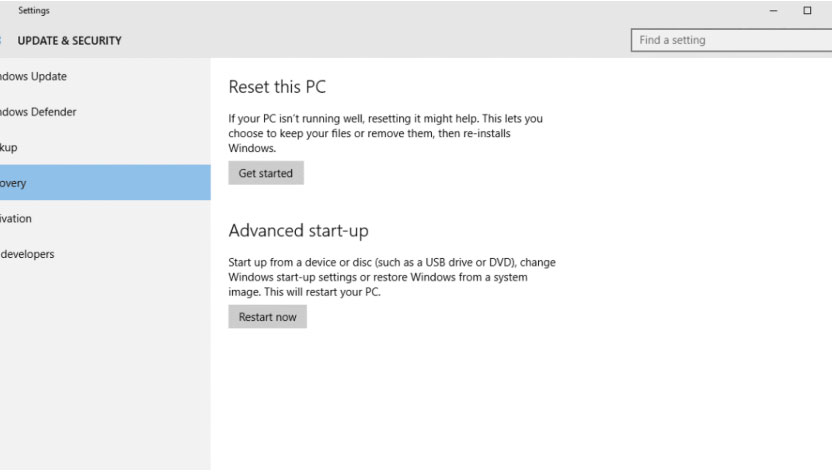
This is a fairly simple process to perform a factory reset on your Windows 10 computer. First, open the Start menu and choose the Settings menu (the coin icon). Choose “Update and Security” in the popup screen, then “Recovery”.

You are then presented with three options – reset this PC, revert to the old version and advanced boot. If you reset this PC, everything will be erased and you can start with a new installation while reverting to the earlier version allows Windows Insiders Tester to revert to the previous version of Windows. The third option, Advanced Boot, provides the option to boot a PC from a recovery drive or USB disk.

How to Factory Reset Windows 10

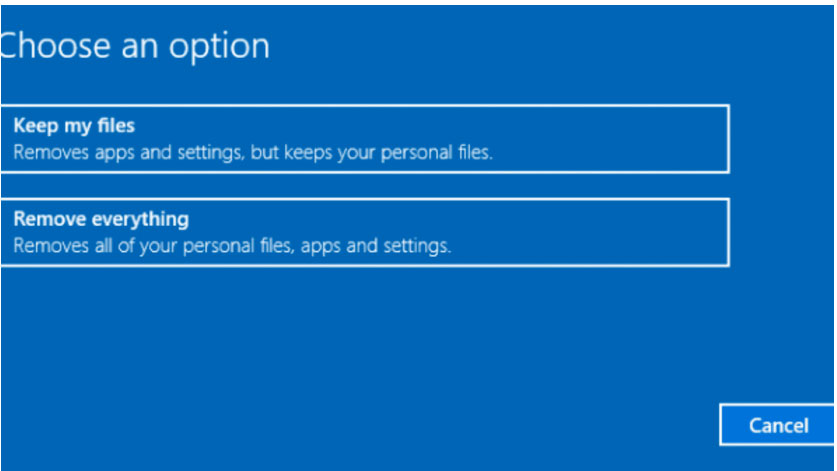
After choosing “Reset this PC” – the option to reinstall Windows 10 on your computer, you can either choose to keep your files on the machine or delete everything – the latter will do as As that name suggests – delete absolutely everything.

It is important to note that whichever of these you select, all applications will be removed from the computer and the rest will be returned to their default values. Although if the first option is selected, all data will remain on the machine, you may find that if you have not installed the corresponding software you will not be able to open it.

fix Factory Reset Windows 10

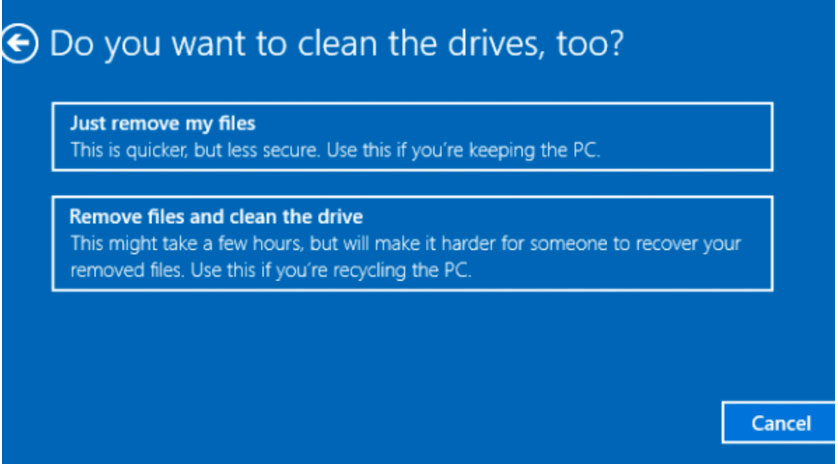
If you have chosen to delete everything, you will be asked to “just delete my files” or “delete files and clean the drive”. The latter option will take longer because the drive has been successfully erased. This is a good option if you give the PC to someone else. If you have a computer, choose the old one for speed.

The next window will warn you that you cannot revert to a previous version of Windows. If it is ok, then click “Next” to continue. After this click on the reset button and Windows will restart and then reset. This process will take several minutes. Finally, click Continue when prompted.

How to reset Factory Windows 10

Once the PC is restarted, you can reinstall your applications and configure the settings. If the system is still hanging, a hardware problem may occur, in which case, a hardware engineer may need to inspect the system for any PC problems.

How to remove bloatware from Windows 10

It is a fact of life that most Windows PCs come with an amazing class of software that most users never wanted or would never use. Fortunately, Microsoft has a tool that allows the user to install a clean version of Windows without any OEM program to clutter your system.

To download the tool, click here. To use it, you have to register for the Windows Insider program. If you don’t mind being a guinea pig, you can do so by clicking Settings> Update & Security> Windows Update> Advanced Options> Get Insider Preview Version> Start. The link above gives more information on this approach.

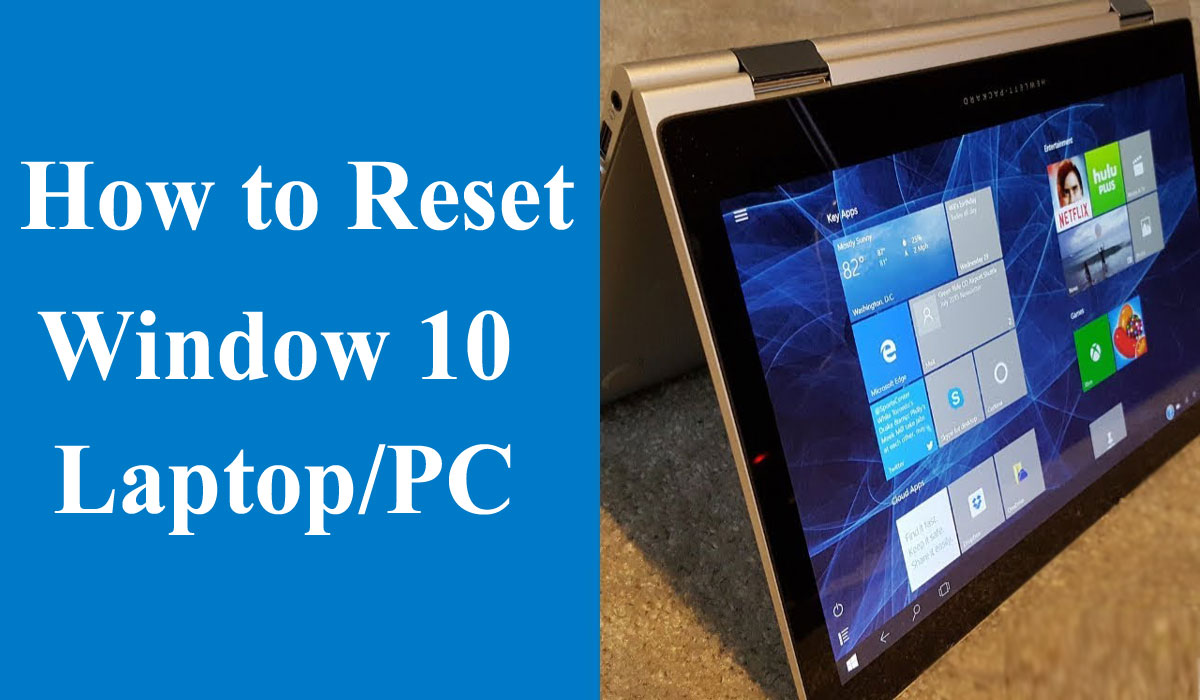
How to Reset Windows 10 laptop: Format your PC

 Windows 10 suffers from all kinds of issues, from files suddenly disappearing to issues installing updates. If your computer is not performing, you should make strange errors, or run slowly, perhaps it’s time to reset it.

how to reset windows 10

You can also reset your Windows 10 laptop if you are upgrading to a new device and want to sell your old one. Of course, you don’t want to give sensitive people a laptop full of sensitive information and personal documents. Therefore, before trading money for Tech, be sure to reformat your Windows 10 laptop.

Reformatting your PC or restoring it to its previous state can clean all pesky background programs and erase your computer hard drive of all unnecessary files. The operating system offers several options that allow you to reset your Windows 10 computer to its previous state.


Here’s how to reset your PC to Windows 10 using the Settings menu. If you cannot access the settings, scroll down to the instructions on how to format Windows 10 from the login screen.


How to Reset Windows 10 PC

1. Navigate to Settings. You can get there by clicking the gear icon on the start menu.

2. Select “Update and Security”

3. Click Recovery in the left pane.

4. Windows presents you with three major options: Reset this PC, go back to pre-built and advanced startup. Reset this PC is the best option to start anew.

Advanced startup lets you boot a recovery USB drive or disk and “Go to the previous build” is built for Windows Insiders who want to roll back to a previous version of the OS.

5. Click Start under Reset this PC.

6. Click “Keep My Files” or “Remove Everything”, depending on whether you want to keep your data files intact. If not, delete everything as it says: delete all your files, photos, and programs. Either way, all your settings will revert to their defaults and applications will be uninstalled.

7. Select Just Delete My Files or Remove Files and Clean the Drive if you chose “Remove Everything” in the first step.

It takes too much time to clean the drive but will make sure that, if you are giving away the computer, the next person cannot recover your erased files. If you are keeping a computer, select “Just delete my files”.

8. Click Next if Windows warns you that you will not be able to roll back to an earlier version of the OS.

9. Click Reset when prompted. Windows will restart again and take several minutes to reset itself.

10. Click Continue when prompted.


How to reformat Windows 10 from the sign-in screen


If your laptop is working and you cannot access the Settings menu, you can try resetting your PC from the login screen.


  • Press the Windows logo key and L on your keyboard. This will take you to the Windows 10 login screen. Do not log in.
  • Instead, you can reset your PC by pressing the Shift key while clicking the Power button> Restart in the lower right corner of the screen.
  • Your PC will restart in the Windows Recovery Environment (WinRE).
  • From the Options screen, select Troubleshooting> Reset this PC. From there, choose from the options listed above.


Hope you have fewer hiccups now that you know how to reset your Windows 10 PC. And if you are planning to sell or give away your laptop, you can do so keeping in mind that the next owner will not. There is no access to your files.

Friday, December 25, 2020

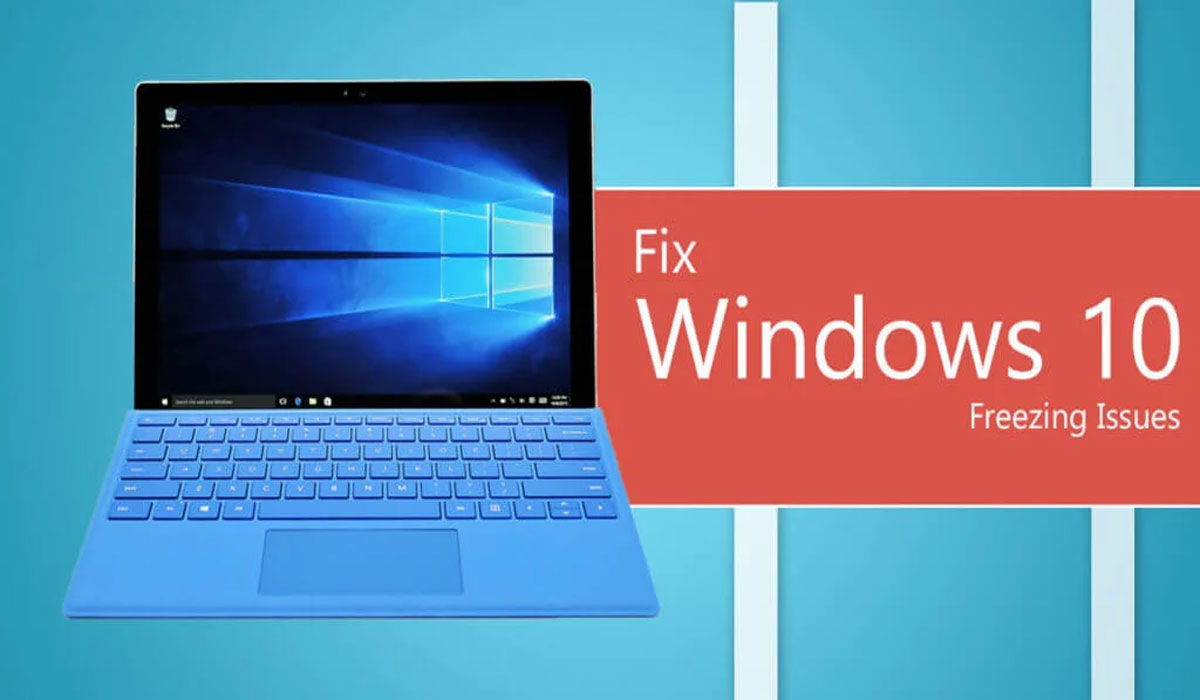
How to Fix Windows 10 Freezing Issues with 7 Ways

 Windows 10 offers many features for standard and experienced users, making it the most popular operating system in the world. With its advanced integration and personalization features, the operating system allows users to personalize and enhance their online and offline experience. However, it is not smooth at all. Windows 10 users may experience a random freeze issue, compromising their performance. In this article, we will look at the possible causes of this problem and various solutions to Fix Windows 10 Freezing Issues with 7 Ways the problem.

Windows 10 Freezing Issues

There is a problem of freeze different variants of Windows 10

  • Windows 10 hangs at random – the PC does not react at frequent intervals. The problem may last a few seconds or longer.
  • Windows 10 hangs on login – Windows 10 hangs on startup.
  • Windows crashes after an update – freezing occurs when the user installs the update.
  • Others – Windows 10 may also be idle when shut down, become inactive, connect to the network, or open applications.

There are various reasons that can cause frost problems with the most common ones;

  • Some missing or corrupt system files.
  • Virus or malware attacks.
  • An updated device driver or driver errors.
  • Third-party software in conflict.
  • Hardware problems can cause more heat.

Whatever the variation or cause, the freeze affects the performance of your computer, which can slow down the system. The problem can also cause the system to crash, so it needs to be fixed before turning it into a larger problem.

How to fix windows 10 freeze problems?

1. Remove the PC connected devices

  • Remove all external devices such as flash disks, printers, speakers, etc. And leave only the mouse and keyboard. The best approach is to disconnect each device at once, to see if the PC is responding.
  • If the PC is unlocked after removing the device, you will have to repair or clean the disk to prevent further freezing.

2. Close open application

  • If you have open applications, press the “Alt + F4” key on your keyboard to close each active application until the freeze closes.
  • If the problem persists, you can press the “Ctrl + Alt + Del” key and open the task manager.
  • Scroll down to the “Process” tab to find unresponsive processes. Select the process and click the “Finish task” button.

3. Delete Temporary Files

  • Less disk space can make Windows 10 easier, and in this case, creating more space on your disk can fix the problem.
  • Press the “Win + I” key to open the Windows 10 Settings application and access the “System” settings.
  • In the left pane, select “Storage” and click on the “now free space” link.
  • Windows will compile and display all temporary files. Click the “Delete Files” button at the top of the list.
  • You can also activate the “storage detection” function so that Windows can be used to automatically free up space to temporarily delete files.

4. Delete Temporary Files Manually

  • Press the “Win + R” keys to open the execution tool, type “temp” and press Enter.
  • This will open the “Temp” folder in File Explorer. Select all files and folders (Ctrl + A) then press “Shift + Delete” to delete the files.

5. Run Windows Disk Cleanup Manager

  • Type the command “cleanmgr” in the Windows runtime utility and press Enter.
  • Select the drive in the pop-up window that appears and click “OK”.
  • Check the boxes to select the files you want to delete and click the “OK” button.
  • Windows will automatically remove all unnecessary files from the system.

6. Update all drivers for your device or fix errors

  • Fixing errors or updating device drivers can solve the crash issue.
  • Type “devmgmt.msc” into the runtime utility and click “OK” to open Device Manager.
  • Check the drivers that may contain errors (identified by the yellow exclamation mark), right-click on the driver and choose “Uninstall Device”, then restart your PC.
  • You can check and install driver updates by right-clicking on the device and selecting the “Update Driver” option.
  • Choose the Auto Update option and Windows 10 will automatically search and install the updated driver online.
7. Adjust Virtual Memory

Virtual memory is the part of the hard drive space that the system uses as RAM. To extend virtual memory:

  • Right-click on “This PC” in File Explorer and open “Properties”.
  • Go to the “Advanced System Settings” option in the left pane and go to the “Advanced” tab, then open the “Display” settings.
  • Under “Advanced”, click the “Change” button to adjust the virtual memory.
  • Check the “Customize Size” box, enter the maximum possible size, and click “OK”.
Conclusion

There are several possible causes of a Fix Windows 10 Freezing Issues. The problem can really irritate and affect your performance. If you face such a problem, you can use the above methods to troubleshoot and resolve the problem.

Thursday, December 24, 2020

How to Delete Backup Files in Windows 10

 There are several good reasons why you can configure Windows 10 backup. In the event of a problem, a backup can help restore your files and your system with little or no data loss. Unfortunately, the bottom is wasted space – these files can fill your hard drive, especially on smaller drives. how to delete backup files in Windows 10

Delete Backup Files in Windows 10

Although we still recommend that you maintain an automated system backup, Windows will fill your drive with unnecessary backup files, which you can periodically delete, including older Windows update files. If you want to know how to delete backup files in Windows 10, here is what you need to do.

Delete windows file history

Windows 10 provides a better system for regular file backup than older versions, thanks to an integrated file backup system. Using Windows File History, copies of files in some important folders are saved regularly, once every 10 minutes once a day, copies are saved indefinitely.

Over time, this can mean a dramatic increase in the storage space used. If you want to know how to delete backup files in Windows 10, deleting your backup from Windows File History should be the first task in your list.

1- To begin, you need to open the Windows Settings menu: right-click the Windows Start menu and press Settings. From here, tap Update and Security> Backup. If you are already using Windows File History, tap the More Options button.

Backup Files in Windows 10

2- In the Backup Options menu, you can change the frequency with which file backups are made and the frequency with which they are saved before being deleted. Convert them to Backup My Files and keep the My Backup drop-down menu.

Backup Files in Windows 10

By default, the Keep My Backup option is set to Always. If you change it to remove backups every month or when space is needed, your available disk space will increase.

3- You can completely disable Windows File History by tapping Stop using this drive option in the Backup Options menu. This will delete your current Windows file backup drive, completely disabling the functionality.

Backup Files in Windows 10

4- If you want to immediately delete all the saved backup files from the file history, you have to right-click on the Windows Start menu and press the Windows PowerShell (Admin) option.

Backup Files in Windows 10

5- In the PowerShell window that appears, type fhmanagew.exe -cleanup 0, but to delete all recent file backups, then press Enter to run the command. You can change with another set of 0 days to have a longer backup period. If the command is successful, a popup window will appear to confirm.

Backup Files in Windows 10

Deleting Windows System Restore Points

Backing up files in earlier versions of Windows was not an all-or-nothing, at least as far as the underlying functionality was concerned. One of the first backup features was the System Restore function, which stored a snapshot of your installation and your current Windows files.

This feature still exists in Windows 10 and is used to create restore points for major system updates. If enabled and too many restore points are created, it can occupy valuable disk space. Deleting some of these restore points can be a good way to free up space for other files.

1- To remove system restore points, press Windows + R on your keyboard to open the run window, type systempropertyprotection, and press Enter.

Backup Files in Windows 10

2- This will open the System Properties window. In the System Security tab, press the Configure button.

how to Backup Files in Windows 10

3- In the system protection window, press the delete button. This will remove all saved system restore points. You can also change the disk space used by this function by moving the slider to the maximum usage.

how to deleted Backup Files in Windows 10

4- Although not recommended, you can also disable this function and restore all space reserved for system security by pressing the Disable System Protection radio button for normal use. When done, press OK to save your settings.

Backup Files in Windows 10

Once disabled, any space already placed for system restore points will be released so that you can use it elsewhere.


Delete Windows.old folder after Windows 10 update

If you want to free up space after a major Windows 10 update, you should first delete the Windows.old folder. When a major Windows update occurs, this folder is automatically created as a backup to your old Windows installation.

You don’t have to worry about deleting this folder in most cases: Windows will automatically delete it after one month of the upgrade. If you want to delete it first to retrieve it faster, you can do so.

1- To delete the Windows.old folder, you must run the Disk Cleanup tool. Press the Windows key + R and type cleanmgr, then click OK to launch it.

Delete Backup Files in Windows 10

2- In the Disk Cleanup window, tap on the Clean Up System Files option to display the options for deleting system files.

Delete Backup Files in Windows 10

3- In the Files to delete the list, make sure that the previous Windows installation (s) checkbox is selected. To save additional space, you can also activate other settings or delete folders at this point. Once ready, press OK to begin the removal process.

How to Delete Backup Files in Windows 10

This will remove the Windows.old folder, restoring several gigabytes of space in the process. However, you will not be able to restore the old installation of Windows after doing this. So make sure that updates or new installations are working properly before continuing.

Erase disk space with windows 10

Although you should be able to delete all unnecessary backup files in Windows, Windows 10. There are other and better ways to create more space. For example, you can search and delete large files. To free up space for other applications and folders.

If that does not work, you may need to consider uninstalling Windows 10 software to make room for other essential files, including your important Windows 10 backup files.

Adobe software list: Which apps do you need? Part 1

  The Adobe software list is long, as the Creative Cloud suite covers pretty much every creative need. Whether you're a graphic designer...

Most View